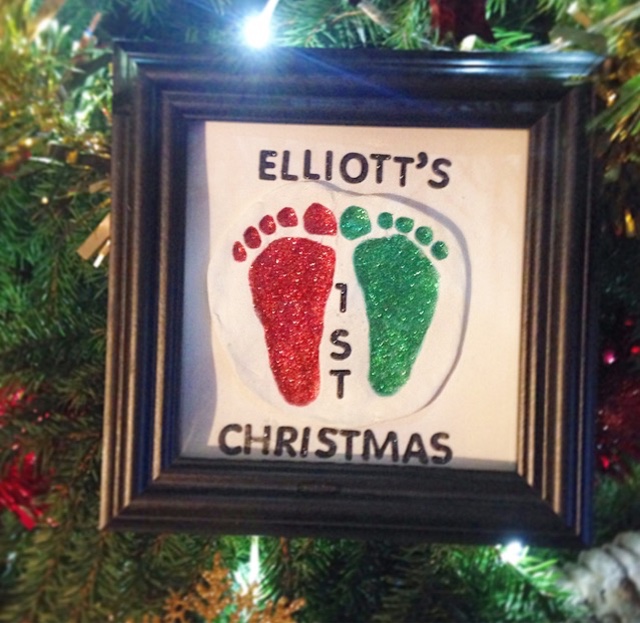
We haven't done too much Christmassy
crafty things this year other than making our own Christmas cards, there is a post going up this week!
This year I found it 100x more difficult to get Elliott to join in with Christmas crafts, it's difficult when he has the attention span of a goldfish!
Although saying that I was all out of ideas this year as last year was Elliott's first Christmas and I wanted to make as many memories as possible and get lots of 1st things made - like the Christmassy Foot Prints above.
I thought I would share last years post with you again in case you want to do some cute Christmas keepsakes with your little ones! This cute box frame has been proudly sitting on our window sill since this time last year. It's just too beautiful not to display all year round!
As I'm sure you're all aware I am a big lover of Hobbycraft and as soon as I step foot in the shop my little wheels start to turn and I begin to think of the next project that I want to start!
Back
in October last year I had the idea that I would give out something meaningful
and that the grandparents can keep for years to come and look back on,
so a little look though Pinterest and I got this idea!
I
already had some air drying clay from previous crafting times (for the Christmassy Hanprints!) so I
rolled some out and while Elliott was jumping like a mad man in his
Jumperoo I managed to get imprints of his tootsies!
He
wasn't bothered that I was pressing his feet into the clay, in fact he
loved it! I clapped everytime we did one which made him excited to do
more!
I cut around them to make
them a bit neater and then left them out to dry for a good week, it
takes a couple of days to dry but I was in no rush to get them done!
One evening I took the
three clay prints (one for both sets of grandparents and one for our
house!) and an emery board and files the edges to make it look more
neater and rounder. This was pretty messy so I would advise doing this
either at the table or with lots of newspaper around! I didn't, and was
hoovering at some silly time at night!
I found this really easy and after doing them all they instantly looked far better than before.
I
got set to paint them, I painted a base coat of red and green. The clay
absorbed most of the paint so I went over it a couple of times. I just
had kids paints so perhaps if you were to use good quality you wouldn't
need so many coats.
I left this for a couple of days for it fully set.
I
bought some glitter glue from Hobbycraft for the Christmas Handprints
so with the glue and a paintbrush I set to work, carefully getting the
glitter in every crease! I did one rough coat and left to dry over night
and then did a second coat, the second coat I made sure that the
glitter was bold and thick. This took a bit longer to dry as I applied a
lot of glitter glue!
The foot
prints stayed like this for a week or so, while I searched for box
frames! Which proved very hard to find for a reasonable price! Again I
came back to Hobbycraft and got 3 frames for £8 each.
Ideally
I wanted 3 white frames but sadly the White frames were discontinued
and I only got one! The black frames are fine though!
While there I also got black glitter lettering. I needed 4 packets as we have a lot of T's!! Haha!
I used sticky back tape that you can use to hold photo frames onto a wall to fix the foot prints to the card in the frame then added some lettering around the prints and that's it, you'll have something beauitful that you will cherish forever!
This was so easy to do aswell and is a fantastic memory - I can't believe
his feet were that small! Like I said this is displayed everyday and still look as good as the day they were finished! I absolutely love it!
If you want to read the original post from last year it is here!


 beauisblue@gmail.com


Painting a home is one of the most challenging tasks that you can undertake. This is regardless of whether you hire a professional painter or you do it yourself. You must be ready to put in much hard labor and time if you decide on DIY painting.
ReplyDelete